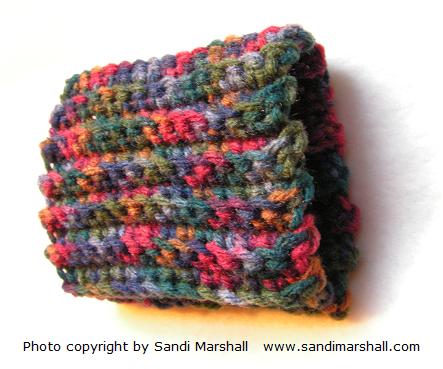
I enjoy watching the color pattern emerge as I crochet with multicolor yarns and so, I like to experiment with the color changes in these yarns. The photo shows a super easy wristband that I crocheted with Williamsburg Print multicolor yarn, which has short sections of each color, causing the color to change after every 1, 2 or 3 single crochet stitches, as you can see in the photo.
If you want a quick, easy project and could use a wristband or wrist warmer, I wrote directions so you can make one too. This sort of wrist band makes a great gift for all ages. Just match the colors you use to the age of the person you’re giving it to. If you make it with cotton yarn, it can be an exercise band or, when made with acrylic, wool or other fibers, it can be a wristwarmer. Maybe you’ll enjoy making some for yourself and some for gifts! As another gift idea, the elderly appreciate having a wristwarmer like this, in all seasons of the year, to warm wrists that feel cold due to poor circulation. Nursing homes often welcome donations of this sort for their residents. If you make lapghans to donate to nursing homes, perhaps they would be delighted to receive donations of some wristwarmers, as well.
This pattern is so simple that any number of crocheters could easily think it up (or something very similar) on their own but I’ve written directions for the wristband that I came up with, for any new crocheters who may not have become familiar yet with making stitches in just one loop (to provide stretch to a piece) so wouldn’t know how to make the band from just seeing the photo … or anyone who would see my photo of the wristband on this page and would like to try it out without having to come up with the pattern on their own. So, just for the sake of making it easy for anyone to crochet one, here’s my directions for this super simple band, that is in a crocheted ribbing pattern:
Materials: Any worsted weight yarn (I used Red Heart Super Saver Yarn, color Williamsburg Print), US size H crochet hook

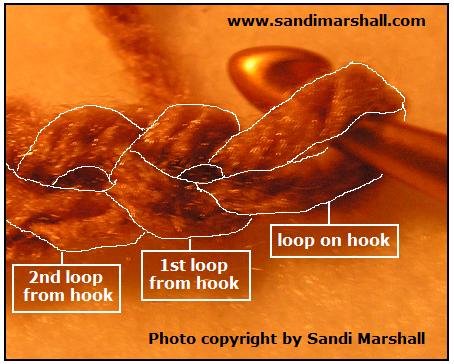
The photo above shows which chain is the second chain from the hook. When a pattern says to crochet in 2nd chain from hook, you don’t count the chain that is already on the hook. I’ve outlined the individual chains in white on the photo so it will be easier to see them and to understand which chain is considered to be the “2nd chain from the hook”.
Starting Chain: chain 16.
Row 1: single crochet in 2nd chain from hook, single crochet in each chain across. (15 sc in the row)
Row 2: chain 1 to turn, single crochet in the back loop only of each single crochet in the row (making 15 sc in the row).
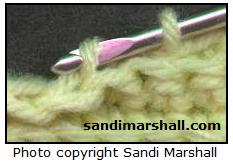
 The photo on the left shows where the crochet hook is inserted to crochet in the back loop only of a single crochet stitch.
Rows 3 – 28: Repeat Row 2.
Note: A size of 28 rows fits my wrist a little loosely (but I can also pull it partway over my hand comfortably in this size, when I want to wear it like a fingerless glove to warm part of my hand as well as my wrist). My wrist is an average size ladies wrist. The piece that I made is 4 1/4 inches wide and 7 1/2 inches long, before sewing the ends together to make the tube shape. If you are making this for a child, you’ll want to crochet fewer rows or, if it will be for a man, you’ll want to crochet more rows. The number of rows you will need will also depend partly on your individual crochet gauge and the yarn weight and hook that you are using. When you think you are close to the number of rows you will need, try it around the wrist of the person who will be wearing it, before sewing the side seam together and adjust the number of rows up or down, as needed.
When you have reached the number of rows that will result in the size that you want, end off, leaving a long strand to use for sewing the edges together.
Next, prepare to sew a seam by folding the band in half (with the right sides facing inward) and lining up the last row and the first row together, then using a large-eye needle threaded with the ending strand of yarn, sew through the stitches on the edges of the first and last row, to join these edges together. Weave in leftover ends. Turn the piece right side out.
This article written by Sandi Marshall. If others would like to see it, please give the url for this page so that they may come to this site for themselves and benefit from everything this site has to offer. Thank you. The permalink url for this page is https://www.sandimarshall.com/williamsburg-print-yarn/
Online Yarn Sources:
If you are looking for the Williamsburg Print color to try it out, it is available also online at the JoAnn Store and at Create For Less. Following are links so you can check out the prices at each. At the Create For Less store, it is purchased in bags of 3 skeins per bag and the price listed on that store page is the price of one skein.
At the JoAnn Store:
Red Heart Super Saver Yarn-Williamsburg Print
At Create For Less:
Coats & Clark Red Heart Super Saver 4 ply Williamsburg Print

Click on the Share/Save button below to let others know about this page on Twitter, Facebook, Digg, etc.:

